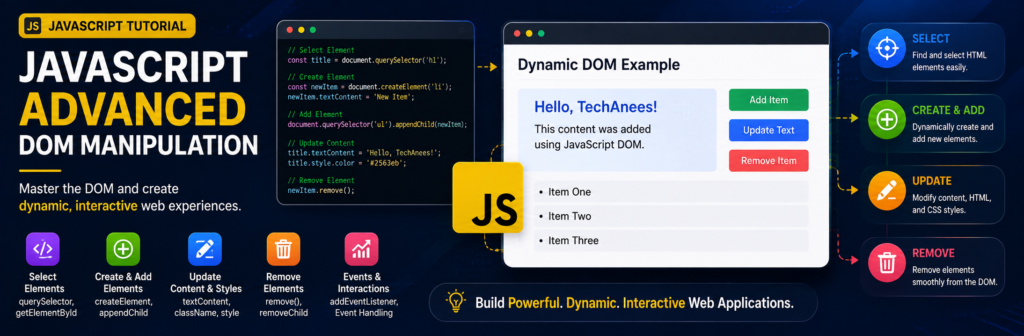
JavaScript DOM Manipulation Tutorial for Beginners, Complete Practical Guide
When you create a website with HTML, you build the structure of the page. When you use CSS, you control how that structure looks. But when you want your webpage to react to users, change content automatically, add or remove elements, open menus, validate forms, create interactive lists, or build dynamic interfaces, you need JavaScript DOM manipulation.
The DOM is one of the most important concepts you will learn in JavaScript.
What You Will Learn
By the end of this tutorial, you will understand how to:
- Understand the JavaScript DOM
- Select HTML elements using JavaScript
- Change text and HTML content
- Change CSS styles
- Add and remove CSS classes
- Work with HTML attributes
- Create new HTML elements
- Add elements to a webpage
- Remove and replace elements
- Navigate between DOM elements
- Handle user events
- Understand the event object
- Use event delegation
- Work with forms
- Prevent default browser behavior
- Build interactive DOM projects
What Is the DOM in JavaScript?
DOM stands for:
Document Object Model
When a browser loads an HTML document, it converts the HTML code into a tree-like structure of objects.
JavaScript can then access this structure and modify it.
Suppose our HTML contains:
<body>
    <h1>Hello World</h1>
    <p>Welcome to my website.</p>
</body>
The browser represents the document approximately like this:
Document
│
└── html
    │
    └── body
        │
        ├── h1
        │   └── "Hello World"
        │
        └── p
            └── "Welcome to my website."
Each HTML element becomes an object in the DOM.
JavaScript can access these objects and perform actions such as:
document.querySelector("h1");
We can then change that element:
document.querySelector("h1").textContent = "Welcome to TechAnees";
The heading displayed in the browser changes without requiring us to manually rewrite the HTML file.
Why Is DOM Manipulation Important?
DOM manipulation makes websites interactive.
Without JavaScript DOM manipulation, most webpages would remain mostly static.
DOM manipulation can be used to create features such as:
- Navigation menus
- Dropdown menus
- Tabs
- Accordions
- Popups and modals
- Image galleries
- Shopping carts
- Todo applications
- Form validation
- Dark mode
- Search filters
- Notification systems
- Interactive dashboards
- Dynamic tables
- Quiz applications
For example, when someone clicks a button and a menu opens, JavaScript is usually changing the DOM.
The document Object
JavaScript provides the document object for accessing the webpage.
For example:
console.log(document);
The document object represents the HTML document currently loaded in the browser.
Through it, JavaScript can search for elements.
document.getElementById();
document.querySelector();
document.querySelectorAll();
document.createElement();
These methods are extremely important when working with the DOM.
Selecting HTML Elements
Before JavaScript can change an element, it normally needs to select that element.
There are several ways to do this.
Selecting an Element by ID
Suppose we have:
<h1 id="title">JavaScript DOM</h1>
JavaScript:
const heading = document.getElementById("title");

console.log(heading);
The variable heading now contains a reference to the <h1> element.
Notice that we write:
"title"
not:
"#title"
when using getElementById().
Selecting an Element With querySelector()
Modern JavaScript commonly uses:
document.querySelector();
It accepts CSS selectors.
HTML:
<h2 class="heading">Learn JavaScript</h2>
JavaScript:
const heading = document.querySelector(".heading");
For an ID:
const heading = document.querySelector("#title");
For an HTML element:
const paragraph = document.querySelector("p");
querySelector() returns the first matching element.
Selecting Multiple Elements
Suppose our webpage contains:
<p class="info">HTML</p>
<p class="info">CSS</p>
<p class="info">JavaScript</p>
We can select all of them using:
const paragraphs = document.querySelectorAll(".info");

console.log(paragraphs);
We can loop through them:
paragraphs.forEach(function(paragraph) {
    console.log(paragraph.textContent);
});
Or using an arrow function:
paragraphs.forEach(paragraph => {
    console.log(paragraph.textContent);
});
This is one useful connection between array-style iteration and DOM manipulation.
querySelector() vs querySelectorAll()
Consider:
document.querySelector(".card");
This returns only the first matching .card.
But:
document.querySelectorAll(".card");
returns all matching elements.
Example:
const cards = document.querySelectorAll(".card");

cards.forEach(card => {
    console.log(card);
});
Changing Text Content
One of the simplest DOM operations is changing text.
HTML:
<h1 id="message">Hello</h1>
JavaScript:
const message = document.querySelector("#message");

message.textContent = "Welcome to JavaScript";
The browser now displays:
Welcome to JavaScript
Using innerText
You may also see:
element.innerText
Example:
const heading = document.querySelector("h1");

heading.innerText = "Learning DOM Manipulation";
Both textContent and innerText can work with text, although their behavior differs in some situations.
For straightforward DOM manipulation, textContent is often a good choice when you simply want to work with text.
Using innerHTML
innerHTML allows you to insert HTML markup inside an element.
HTML:
<div id="content"></div>
JavaScript:
const content = document.querySelector("#content");

content.innerHTML = "<h2>JavaScript</h2><p>Learn DOM manipulation.</p>";
The browser creates:
<div id="content">
    <h2>JavaScript</h2>
    <p>Learn DOM manipulation.</p>
</div>
Be Careful With innerHTML
Do not insert untrusted user input directly into innerHTML.
For ordinary text, prefer:
element.textContent = userInput;
This avoids interpreting the input as HTML.
Changing CSS With JavaScript
JavaScript can directly change an element’s inline styles.
HTML:
<h1 id="title">TechAnees</h1>
JavaScript:
const title = document.querySelector("#title");

title.style.color = "blue";
title.style.backgroundColor = "lightgray";
title.style.padding = "20px";
Notice this property:
backgroundColor
CSS normally uses:
background-color
JavaScript style properties commonly use camelCase.
For example:
CSS                  JavaScript

background-color     backgroundColor
font-size            fontSize
border-radius        borderRadius
margin-top           marginTop
Better Method: Use CSS Classes
Although .style is useful, larger projects are usually easier to maintain when CSS stays inside the stylesheet.
CSS:
.highlight {
    background-color: yellow;
    color: black;
    padding: 20px;
}
JavaScript:
const box = document.querySelector(".box");

box.classList.add("highlight");
This keeps styling separate from JavaScript logic.
Working With classList
The classList property makes it easy to manage CSS classes.
Add a Class
element.classList.add("active");
Remove a Class
element.classList.remove("active");
Toggle a Class
element.classList.toggle("active");
Check Whether a Class Exists
element.classList.contains("active");
Example:
const button = document.querySelector("#menuButton");
const menu = document.querySelector("#menu");

button.addEventListener("click", function() {
    menu.classList.toggle("active");
});
This technique is commonly used for mobile menus, accordions, dark mode, and dropdowns.
Dark Mode Example
HTML:
<button id="themeButton">Toggle Theme</button>

<h1>My Website</h1>
<p>Welcome to the website.</p>
CSS:
.dark {
    background-color: #111;
    color: white;
}
JavaScript:
const themeButton = document.querySelector("#themeButton");

themeButton.addEventListener("click", function() {
    document.body.classList.toggle("dark");
});
Every time the button is clicked, the dark class is added or removed.
Working With HTML Attributes
HTML elements contain attributes.
Example:
<img id="photo" src="photo1.jpg" alt="Landscape">
JavaScript can read or modify these attributes.
Get an Attribute
const image = document.querySelector("#photo");

console.log(image.getAttribute("src"));
Set an Attribute
image.setAttribute("src", "photo2.jpg");
Change a Property Directly
We can often use:
image.src = "photo2.jpg";
For an anchor:
const link = document.querySelector("a");

link.href = "https://example.com";
Adding Custom Data Attributes
HTML supports custom data-* attributes.
Example:
<button data-product-id="1001">Buy Product</button>
JavaScript:
const button = document.querySelector("button");

console.log(button.dataset.productId);
Output:
1001
Data attributes are useful when connecting HTML elements with IDs, categories, product information, filters, and other application data.
Creating HTML Elements With JavaScript
One of the most powerful DOM features is dynamically creating elements.
Use:
document.createElement();
For example:
const paragraph = document.createElement("p");
This creates a <p> element in memory. It has not yet been added to the visible webpage. The DOM API provides createElement() specifically for creating new HTML elements.
Now give it some text:
paragraph.textContent = "This paragraph was created with JavaScript.";
Then add it to the page:
document.body.appendChild(paragraph);
Complete Create Element Example
HTML:
<div id="container"></div>
JavaScript:
const container = document.querySelector("#container");

const heading = document.createElement("h2");

heading.textContent = "JavaScript DOM";

container.appendChild(heading);
The DOM becomes:
<div id="container">
    <h2>JavaScript DOM</h2>
</div>
Using append()
Modern JavaScript also provides:
element.append();
Example:
const container = document.querySelector("#container");

const paragraph = document.createElement("p");

paragraph.textContent = "Learning DOM manipulation.";

container.append(paragraph);
You can also append multiple items:
container.append(heading, paragraph);
append() vs appendChild()
Both are used to add content.
Example:
container.appendChild(paragraph);
or:
container.append(paragraph);
For beginner projects, understanding both is useful because you will frequently see both in existing JavaScript code and documentation.
Adding Elements Before or After Other Elements
Modern DOM methods include:
element.before();
element.after();
element.prepend();
element.append();
Example HTML:
<div id="container">
    <p>Existing paragraph</p>
</div>
JavaScript:
const container = document.querySelector("#container");

const heading = document.createElement("h2");

heading.textContent = "New Heading";

container.prepend(heading);
Result:
<div id="container">
    <h2>New Heading</h2>
    <p>Existing paragraph</p>
</div>
Removing Elements
Sometimes your application needs to delete content.
HTML:
<p id="message">Delete me</p>
JavaScript:
const message = document.querySelector("#message");

message.remove();
The element disappears from the DOM.
Another method is:
parent.removeChild(child);
MDN documents both parent-based node removal and the simpler element remove() approach.
Replacing an Element
You can replace an existing element.
HTML:
<p id="oldText">Old Content</p>
JavaScript:
const oldText = document.querySelector("#oldText");

const newText = document.createElement("h2");

newText.textContent = "New Content";

oldText.replaceWith(newText);
Now the paragraph is replaced by an <h2>.
Navigating the DOM
Sometimes you already have one element and need to find related elements.
Consider:
<div class="card">
    <h2>JavaScript</h2>
    <p>Learn JavaScript DOM.</p>
    <button>Read More</button>
</div>
Select the card:
const card = document.querySelector(".card");
Parent
console.log(card.parentElement);
Children
console.log(card.children);
First Element Child
console.log(card.firstElementChild);
Last Element Child
console.log(card.lastElementChild);
Sibling Elements
Suppose:
<h2>HTML</h2>
<h2 id="current">CSS</h2>
<h2>JavaScript</h2>
JavaScript:
const current = document.querySelector("#current");

console.log(current.previousElementSibling);
console.log(current.nextElementSibling);
These properties allow us to move between nearby elements in the DOM tree.
JavaScript Events
DOM manipulation becomes especially useful when combined with events.
An event is something that happens inside the browser.
Examples include:
- Clicking
- Typing
- Submitting a form
- Moving the mouse
- Pressing a keyboard key
- Scrolling
- Loading a webpage
- Changing an input
JavaScript can listen for these events.
Using addEventListener()
HTML:
<button id="button">Click Me</button>
JavaScript:
const button = document.querySelector("#button");

button.addEventListener("click", function() {
    console.log("Button clicked");
});
Using an arrow function:
button.addEventListener("click", () => {
    console.log("Button clicked");
});
Using addEventListener() keeps JavaScript behavior separate from HTML and is preferred over placing JavaScript directly inside attributes such as onclick.
Change Content After a Click
HTML:
<h2 id="message">Click the button</h2>

<button id="changeButton">Change Message</button>
JavaScript:
const message = document.querySelector("#message");
const button = document.querySelector("#changeButton");

button.addEventListener("click", function() {
    message.textContent = "You clicked the button!";
});
This is DOM manipulation triggered by an event.
Common JavaScript Events
Some frequently used events include:
Event        Purpose

click        User clicks an element
dblclick     User double-clicks
mouseover    Mouse moves over an element
mouseout     Mouse leaves an element
input        Input value changes
change       Form control value changes
submit       Form is submitted
keydown      Keyboard key is pressed
keyup        Keyboard key is released
focus        Element receives focus
blur         Element loses focus
Example:
const input = document.querySelector("#username");

input.addEventListener("input", function() {
    console.log(input.value);
});
Every time the user types, JavaScript receives the latest value.
Understanding the Event Object
When an event occurs, JavaScript can provide information about that event.
Example:
button.addEventListener("click", function(event) {
    console.log(event);
});
A common abbreviation is:
button.addEventListener("click", function(e) {
    console.log(e);
});
We can find which element triggered the event:
button.addEventListener("click", function(e) {
    console.log(e.target);
});
Event Bubbling
Imagine:
<div class="card">
    <button>Click</button>
</div>
If the button is clicked, the event can travel upward through its parent elements.
Conceptually:
button
  ↓
div
  ↓
body
  ↓
document
This behavior is called event bubbling.
Event bubbling is important because it allows us to use a technique called event delegation.
What Is Event Delegation?
Suppose we have many buttons:
<ul id="list">
    <li>HTML <button>Delete</button></li>
    <li>CSS <button>Delete</button></li>
    <li>JavaScript <button>Delete</button></li>
</ul>
Instead of adding an event listener separately to every button, we can add one listener to the parent:
const list = document.querySelector("#list");

list.addEventListener("click", function(event) {
    if (event.target.tagName === "BUTTON") {
        event.target.parentElement.remove();
    }
});
Now the parent listens for clicks coming from its child elements.
This technique becomes very useful when elements are dynamically added to a page.
Using closest()
closest() can make event delegation easier.
Suppose:
<div class="card">
    <span>JavaScript</span>
    <button class="delete">Delete</button>
</div>
JavaScript:
document.addEventListener("click", function(event) {
    if (event.target.classList.contains("delete")) {
        event.target.closest(".card").remove();
    }
});
closest(".card") searches upward until it finds the nearest matching element.
Working With Forms
DOM manipulation is frequently used with HTML forms.
HTML:
<form id="loginForm">
    <input type="text" id="username">
    <button type="submit">Login</button>
</form>
JavaScript:
const form = document.querySelector("#loginForm");
const username = document.querySelector("#username");

form.addEventListener("submit", function(event) {
    console.log(username.value);
});
However, submitting the form normally causes the browser to perform its default form-submission behavior.
Sometimes we want JavaScript to handle the form first.
Using preventDefault()
We can prevent the normal browser action using:
event.preventDefault();
Example:
form.addEventListener("submit", function(event) {
    event.preventDefault();

    console.log(username.value);
});
The page no longer immediately performs its normal form submission.
Now JavaScript can validate the information.
Simple Form Validation
HTML:
<form id="registerForm">
    <input
        type="text"
        id="name"
        placeholder="Enter your name"
    >

    <button type="submit">
        Register
    </button>

    <p id="error"></p>
</form>
JavaScript:
const form = document.querySelector("#registerForm");
const nameInput = document.querySelector("#name");
const error = document.querySelector("#error");

form.addEventListener("submit", function(event) {
    event.preventDefault();

    if (nameInput.value.trim() === "") {
        error.textContent = "Please enter your name.";
    } else {
        error.textContent = "Registration successful!";
    }
});
Here we:
- Listen for the form submission.
- Prevent its default action.
- Read the input value.
- Check whether the input is empty.
- Change the DOM to display feedback.
Mini Project: Show and Hide Content
HTML:
<button id="toggleButton">Show / Hide</button>

<div id="content">
    <h2>JavaScript DOM</h2>
    <p>This content can be shown or hidden.</p>
</div>
CSS:
.hidden {
    display: none;
}
JavaScript:
const button = document.querySelector("#toggleButton");
const content = document.querySelector("#content");

button.addEventListener("click", function() {
    content.classList.toggle("hidden");
});
Live Code Example:
<button id="toggleButton">Show / Hide</button>

<div id="content">
    <h2>JavaScript DOM</h2>
    <p>This content can be shown or hidden.</p>
</div>

<style>
  .hidden {
      display: none;
  }
</style>

<script>
  const button = document.querySelector("#toggleButton");
  const content = document.querySelector("#content");

  button.addEventListener("click", function() {
      content.classList.toggle("hidden");
  });
</script>
JavaScript DOM
This content can be shown or hidden.
This simple technique can be used for:
- Accordions
- FAQs
- Sidebars
- Dropdown menus
- Mobile navigation
Filtering DOM Content
Array methods can also help us filter information before displaying it.
Example:
const products = [
    { name: "Laptop", price: 120000 },
    { name: "Mouse", price: 2500 },
    { name: "Keyboard", price: 5000 }
];

const affordableProducts = products.filter(function(product) {
    return product.price < 10000;
});

console.log(affordableProducts);
The result contains:
Mouse
Keyboard
We could then display those products using DOM manipulation.
This is why arrays and the DOM frequently work together in real applications.
DOM Manipulation Workflow
A useful pattern to remember is:
1. Select
      ↓
2. Listen
      ↓
3. Read data
      ↓
4. Change data
      ↓
5. Update DOM
For example:
const button = document.querySelector("#button");

button.addEventListener("click", function() {
    const heading = document.querySelector("#title");

    heading.textContent = "Updated";
});
We first select.
Then we listen.
Then we update the DOM.
Common DOM Manipulation Mistakes
1. Forgetting # for an ID With querySelector()
Incorrect:
document.querySelector("title");
if your HTML is:
<h1 id="title">Hello</h1>
Correct:
document.querySelector("#title");
2. Forgetting . for a Class
Incorrect:
document.querySelector("card");
Correct:
document.querySelector(".card");
3. Running JavaScript Before HTML Exists
If JavaScript runs before the browser has created the element, this may return:
null
For example:
const button = document.querySelector("#button");
A common solution is to use an external script with defer:
<script src="script.js" defer></script>
4. Forgetting event.preventDefault() in a Form
If you are performing custom JavaScript form handling and forget:
event.preventDefault();
the page may perform its normal submission behavior before you see the expected result.
5. Using innerHTML for Everything
Instead of:
element.innerHTML = userInput;
prefer:
element.textContent = userInput;
when you simply need to display text.
6. Adding Too Many Individual Event Listeners
Instead of placing a listener on hundreds of dynamically created elements, event delegation can sometimes provide a cleaner solution.
Frequently Asked Questions
What is DOM manipulation in JavaScript?
DOM manipulation means using JavaScript to access and modify the structure, content, attributes, styles, or behavior of HTML elements on a webpage.
What does DOM stand for?
DOM stands for Document Object Model.
The browser represents an HTML page as a tree of objects that JavaScript can access and modify.
What is querySelector()?
querySelector() selects the first element matching a CSS selector.
Example:
document.querySelector(".card");
What is the difference between querySelector() and querySelectorAll()?
querySelector() returns the first matching element.
querySelectorAll() returns all elements matching the selector.
What does createElement() do?
It creates a new HTML element using JavaScript.
Example:
const paragraph = document.createElement("p");
You can then add the element to the DOM.
What is classList?
classList allows JavaScript to add, remove, toggle, and check CSS classes.
Example:
element.classList.toggle("active");
What does addEventListener() do?
It allows JavaScript to execute code when an event happens.
Example:
button.addEventListener("click", function() {
    console.log("Clicked");
});
What is preventDefault()?
preventDefault() stops the browser’s normal action for an event.
It is commonly used with forms when JavaScript needs to perform validation or custom processing before normal submission.
What is event delegation?
Event delegation means placing an event listener on a parent element instead of adding listeners to every individual child.
It is especially useful for dynamically created DOM elements.
Learn Previous Tutorial
JavaScript for Beginners: Introduction, Basic Syntax, Variables and Data Types

About Techanees
Techanees is a technology platform sharing simple tutorials, useful guides, web development tips, and the latest tech updates for beginners and enthusiasts.
nice tutorial
I’m impressed