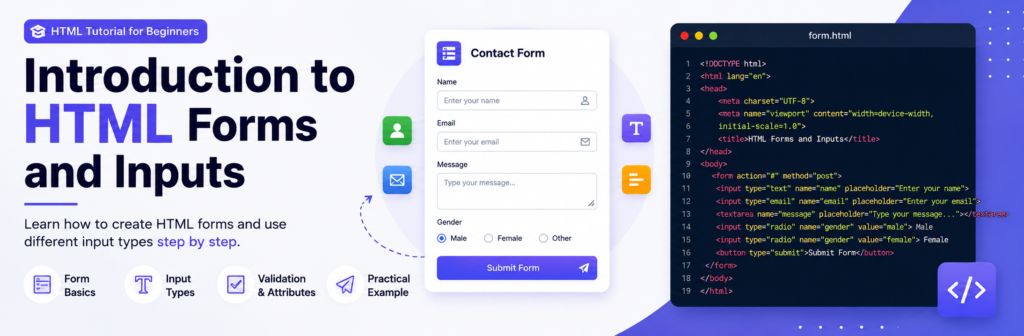
Introduction
Every interactive website from logging into your favorite social platform to submitting a contact request or searching for products online relies on one essential component: HTML Forms.
Forms act as the bridge between web visitors and servers, allowing user input to be collected, processed, and stored efficiently.
What You Will Learn
- Understand Form Fundamentals: Learn what an HTML form is, how the
<form>element functions, and the key roles of theactionandmethod(GETvs.POST) attributes. - Master Essential Input Types: Discover how to create and implement text fields, password masking, single-choice radio buttons, and multi-choice checkboxes.
- Enhance User Experience & Accessibility: Learn to connect input fields with
<label>tags and provide useful user hints using theplaceholderattribute. - Handle Multi-Line Text: Use the
<textarea>element for capturing lengthy user content such as comments, reviews, or messages. - Organize Complex Forms: Structure your input fields visually and semantically using
<fieldset>and<legend>tags. - Implement Form Action Controls: Add functional Submit buttons to allow users to send data.
What is a Form?
HTML uses a form element to encapsulate input and submission elements. These forms handle sending the data in the specified method to a page handled by a server or handler.
This topic explains and demonstrates the usage of HTML forms in collecting and submitting input data.
The action attribute defines the action to be performed when the form is submitted, which usually leads to a script that collects the information submitted and works with it. if you leave it blank, it will send it to the same file.
Code Example:
<form action="action.php">
</form>
The method attribute is used to define the HTTP method of the form which is either GET or POST.
Code Example:
<form action="action.php" method="get">
</form>
<form action="action.php" method="post">
</form>
The GET method is mostly used to get data, for example to receive a post by its ID or name, or to submit a search query. The GET method will append the form data to the URL specified in the action attribute.
The POST method is used when submitting data to a script. The POST method does not append the form data to the action URL but sends using the request body.
Form Structure
A clean, single-column design ideal for capturing user inquiries or newsletter signups. It prioritizes low friction by asking for essential details first.
Code Example:
<form action="/submit-endpoint" method="POST">
  <!-- Text Input -->
  <div class="mb-3">
    <label for="fullName" class="form-label">Full Name</label>
    <input type="text" class="form-control" id="fullName" name="fullName" placeholder="Jane Doe" required>
  </div>

  <!-- Email Input -->
  <div class="mb-3">
    <label for="emailInput" class="form-label">Email Address</label>
    <input type="email" class="form-control" id="emailInput" name="email" placeholder="jane@example.com" required>
  </div>

  <!-- Dropdown Select -->
  <div class="mb-3">
    <label for="topicSelect" class="form-label">Subject</label>
    <select class="form-select" id="topicSelect" name="topic">
      <option selected disabled value="">Choose an option...</option>
      <option value="general">General Inquiry</option>
      <option value="support">Technical Support</option>
      <option value="billing">Billing Question</option>
    </select>
  </div>

  <!-- Textarea -->
  <div class="mb-3">
    <label for="messageTextarea" class="form-label">Message</label>
    <textarea class="form-control" id="messageTextarea" name="message" rows="4" placeholder="How can we help?"></textarea>
  </div>

  <!-- Submit Button -->
  <button type="submit" class="btn btn-primary w-100">Send Message</button>
</form>
Input Types
A key component of interactive web systems, input tags are HTML elements designed to take a specific form of input from users. Different types of input elements can regulate the data entered to fit a specified format and provide security to password entry.
Input Type Text & Email
The most basic input type and the default input if no type is specified. This input type defines a single-line text field with line-breaks automatically removed from the input value.
All other characters can be entered into this <input> elements are used within a <form> element to declare input controls that allow users to input data.
Code Example:
<input type="text" placeholder="text" name="text" >
<input type="email" placeholder="email" name="email">
Input Type Password
The input element with a type attribute whose value is password creates a single-line text field similar to the input type=text, except that text is not displayed as the user enters it.
Code Example:
<input type="password" name="password">
Input Type Radio & Checkboxes
Checkboxes and radio buttons are written with the HTML tag <html>. The simplest checkbox or radio button is an <input> element with a type attribute of checkbox or radio.
Code Example:
<input type="checkbox">
<input type="radio">
A single stand-alone checkbox element is used for a single binary option such as a yes-or-no question. Checkboxes are independent, meaning the user may select as many choices as they would like in a group of checkboxes.
In other words, checking one checkbox does not uncheck the other checkboxes in checkbox group.
Radio buttons usually come in groups (if it’s not grouped with another radio button, you probably meant to use a checkbox instead) identified by using the same name attribute on all buttons within that group.
The selection of radio buttons are mutually exclusive, meaning the user may only select one choice from a group of radio buttons. When a radio button is checked, any other radio button with the same name that was previously checked becomes unchecked.
Labels
To give context to the buttons and show users what each button is for, each of them should have a label. This can be done using a <label> element to wrap the button. Also, this makes the label clickable, so you select the corresponding button.
Code Example:
<label>
<input type="radio" name="color" value="#F00">
Red
</label>
Textarea
An input field only allows one line of text. If you need a multi-line text input for substantial amount of text, use a element instead.
Code Example:
<label>
Textarea
<textarea placeholder="Type your text here...">
</textarea>
</label>
Fieldset & Legend
The <fieldset> and <legend> elements group related form controls and give that group a caption.
Code Example:
<fieldset>
      <legend>Personal Information</legend>

      <label for="fname">First name:</label><br>
      <input type="text" id="fname" name="fname"><br><br>

      <label for="lname">Last name:</label><br>
      <input type="text" id="lname" name="lname">
    </fieldset>
Submit Button
A submit input creates a button which submits the form it is inside when clicked.
Code Example:
<button type="submit">Submit Now</button>
<!-- Or using input -->
<input type="submit" value="Submit Now">
Common Mistakes in HTML Forms
Avoid these common errors when creating HTML forms and inputs.
1. Forgetting the <form> Element
Input fields should normally be placed inside a
<form> element when creating a form that
collects and submits user data.
2. Not Using the name Attribute
The name attribute identifies form data when it is
submitted. Without it, the field value may not be included in
the submitted data.
3. Using the Wrong Input Type
Choose the appropriate input type, such as
email for email addresses and
number for numeric values.
4. Forgetting Labels
Always use <label> elements to clearly describe
form controls and improve accessibility.
5. Using Placeholder Instead of Labels
Placeholder text disappears when users type. It should provide additional guidance rather than replace a proper label.
6. Forgetting required Fields
Use the required attribute when a particular field
must be completed before the form can be submitted.
7. Not Making Forms Responsive
Make sure your forms work properly on mobile phones, tablets, laptops, and desktop screens.
8. Relying Only on HTML Validation
Browser validation improves usability, but important submitted data should also be validated securely on the server.
Frequently Asked Questions
Common questions about HTML forms and input elements.
What is an HTML form?
An HTML form is a section of a webpage used to collect information from users, such as names, email addresses, passwords, messages, and other data.
What is the <form> tag used for?
The <form> element defines a form and provides
a structure for collecting and submitting user input.
What is an <input> element?
The <input> element creates an interactive
control where users can enter or select information.
What are common HTML input types?
Common types include text, email,
password, number, date,
file, checkbox, radio,
url, and submit.
What is the purpose of the label element?
A <label> describes a form control and makes
the form easier to understand and use, including for users who
rely on assistive technologies.
What is the difference between radio buttons and checkboxes?
Radio buttons are generally used when selecting one option from a group, while checkboxes allow users to select one or multiple independent options.
What is the textarea element used for?
The <textarea> element is used for multi-line
text input, such as comments, messages, feedback, and descriptions.
Can CSS be used to style HTML forms?
Yes. CSS can style form fields, labels, buttons, borders, spacing, colors, focus effects, layouts, and responsive behavior.
Can JavaScript be used with HTML forms?
Yes. JavaScript can provide custom validation, dynamic form behavior, interactive messages, and communication with servers or APIs.

About Techanees
Techanees is a technology platform sharing simple tutorials, useful guides, web development tips, and the latest tech updates for beginners and enthusiasts.

Having gone through a similar experience myself, I found your insights particularly validating. You captured emotions I struggled to articulate, which made me feel less alone in my journey. Thank you for sharing something so personal.
so good! Super convenient for learning