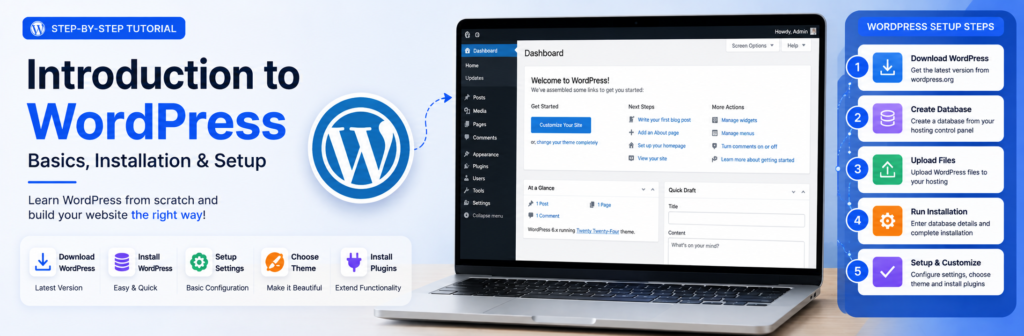
WordPress for Beginners: What Is WordPress, How to Install It and Set Up Your First Website
Want to create a website with WordPress but don’t know where to start? WordPress is one of the most popular platforms for creating websites and blogs, and you don’t need to be an experienced programmer to get started.
What You Will Learn
- What WordPress is
- What a CMS is
- How WordPress works
- WordPress.com vs WordPress.org
- What WordPress themes are
- What WordPress plugins are
- What you need before installing WordPress
- How to install WordPress locally
- How to install XAMPP
- How to create a WordPress database
- How to complete the WordPress installation
- How to log in to the WordPress dashboard
- How to configure basic WordPress settings
- How to install themes and plugins
- How to prepare WordPress for a live website
- Common WordPress beginner mistakes
What Is WordPress?
WordPress is an open-source content management system (CMS) used to create and manage websites.
Instead of creating every part of a website manually with HTML, CSS, JavaScript, PHP, and other technologies, WordPress provides an administration system where you can create content, manage pages, install themes, add functionality, and configure your website.
WordPress can be used to create many different types of websites, including:
- Blogs
- Business websites
- Portfolio websites
- Educational websites
- News websites
- Online magazines
- Membership websites
- E-commerce websites
- Documentation websites
- Personal websites
One of the biggest advantages of WordPress is its flexibility. You can start with a simple website and gradually add more features as your needs grow.
What Is a CMS?
CMS stands for Content Management System.
A CMS is software that helps you create, organize, edit, and manage website content.
Without a CMS, you may need to manually create and edit website files whenever you want to make changes.
With WordPress, you can use an administration dashboard to manage many parts of your website.
For example, you can:
- Write blog posts
- Create pages
- Upload images
- Manage menus
- Change the website design
- Install plugins
- Manage users
- Configure settings
- Organize content into categories
This makes website management much easier for beginners.
How Does WordPress Work?
A WordPress website usually consists of several important components.
WordPress Core
The WordPress core is the main software that powers the website.
Theme
The theme controls much of the website’s visual appearance and layout.
Plugins
Plugins extend WordPress by adding additional functionality.
Database
The database stores important website information such as posts, pages, settings, users, and other data.
Hosting Server
For a live website, WordPress files and its database need to run on a web server.
A simplified structure looks like this:
Visitor → Domain → Web Server → WordPress → Database → Website
WordPress.com vs WordPress.org
This is one of the most important things beginners should understand.
Although both use the WordPress name, they provide different experiences.
WordPress.com
WordPress.com is a hosted service.
The hosting infrastructure is provided as part of the service, with different plans and capabilities depending on the account.
This can be convenient for people who don’t want to manage their own server.
WordPress.org
WordPress.org provides the WordPress software that you can download and install on your own hosting environment.
With a self-hosted WordPress website, you generally have more control over:
- Themes
- Plugins
- Website files
- Hosting
- Database
- Customization
- Server configuration
Which One Should a Beginner Choose?
It depends on your goal.
If you want a simple hosted blogging experience, a hosted WordPress service may be easier.
If you want to learn how websites, hosting, domains, themes, plugins, and WordPress work together, self-hosted WordPress is a powerful option.
What Is a WordPress Theme?
A theme controls the visual design and presentation of your WordPress website.
A theme can influence:
- Layout
- Typography
- Colors
- Header
- Footer
- Navigation
- Blog layout
- Page design
- Responsive behavior
Think of the theme as the design layer of your website.
You can change themes without manually rebuilding every page from scratch, although changing themes can affect the appearance and functionality of an existing site.
What Is a WordPress Plugin?
A plugin adds functionality to WordPress.
For example, plugins can provide features such as:
- Contact forms
- SEO tools
- Security features
- Caching
- Backups
- Analytics integration
- E-commerce
- Membership systems
- Social sharing
- Custom fields
Think of plugins as extensions that add capabilities to WordPress.
However, don’t install dozens of unnecessary plugins.
Use plugins that are reputable, maintained, compatible with your WordPress version, and genuinely useful for your website.
What Do You Need Before Installing WordPress?
If you want to install WordPress locally on your computer, you need:
- A computer
- A modern web browser
- WordPress
- A local web-server environment
- PHP
- A database system
One beginner-friendly way to create this local environment is XAMPP.
If you want to create a live website, you generally need:
- A domain name
- Web hosting
- WordPress
- An SSL/TLS certificate
Why Install WordPress Locally?
Installing WordPress locally means running your website on your own computer instead of making it publicly accessible on the internet.
This is useful for learning and testing.
You can experiment with:
- Themes
- Plugins
- Pages
- Menus
- WordPress settings
- Custom code
- Website designs
without making those changes directly to your live website.
A local WordPress installation is particularly useful for beginners who want to learn WordPress before launching a real website.
Install WordPress Locally Using XAMPP
Now let’s go through the local installation process.
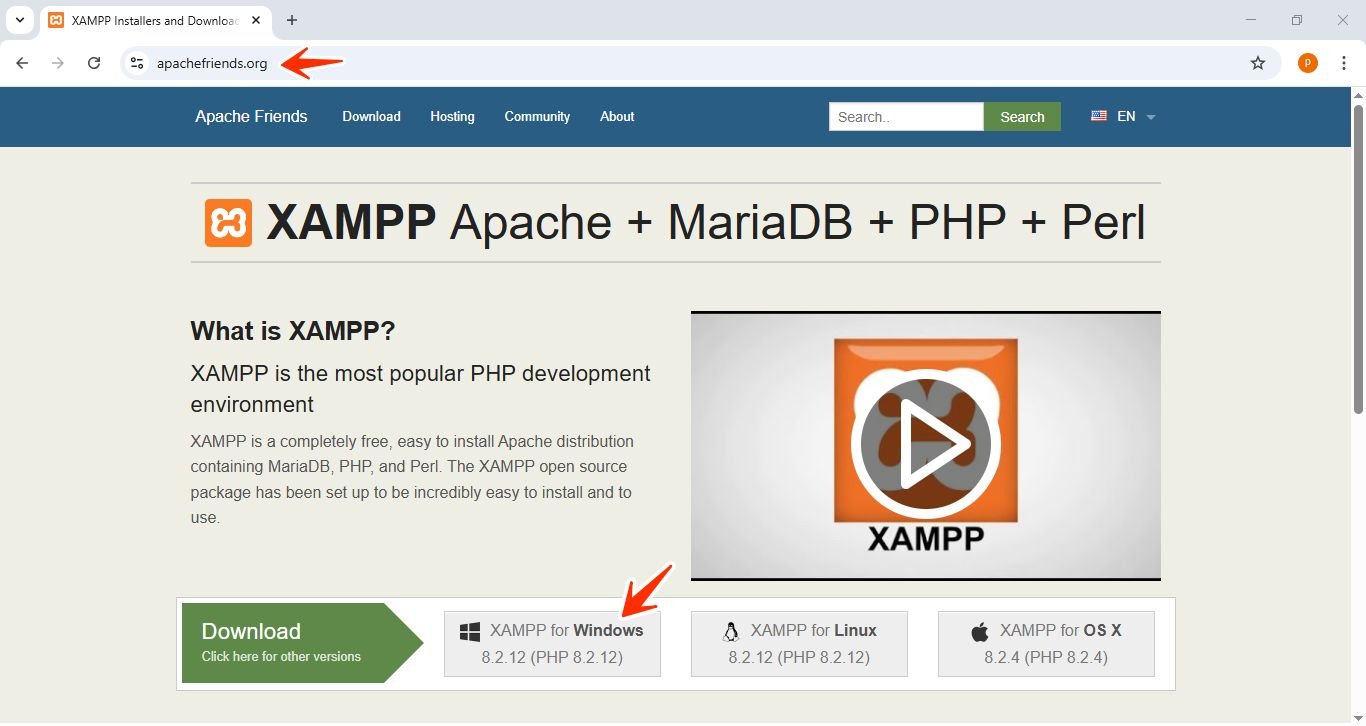
Step 1: Download XAMPP
First, download XAMPP from the official Apache Friends website.
Choose the version appropriate for your operating system.
XAMPP provides a local development environment containing components commonly used to run PHP-based applications.
Step 2: Install XAMPP
Run the XAMPP installer.
During installation, select the components you need.
For a basic WordPress installation, the important components include:
- Apache
- MySQL/MariaDB
- PHP
- phpMyAdmin
The exact components and names may vary depending on the XAMPP version.
On Windows, a common installation location is:
C:\xampp
After installation, open the XAMPP Control Panel.
Step 3: Start Apache and Database Services
In the XAMPP Control Panel, start:
Apache
and
MySQL
If both services start successfully, your local server environment is running.
Open your browser and visit:
http://localhost/
If the XAMPP dashboard appears, your local server is working.
If Apache Doesn’t Start
Another application may already be using the required port.
Common causes include another web server or software that uses the same network port.
If this happens, check the XAMPP error information before changing configuration files.
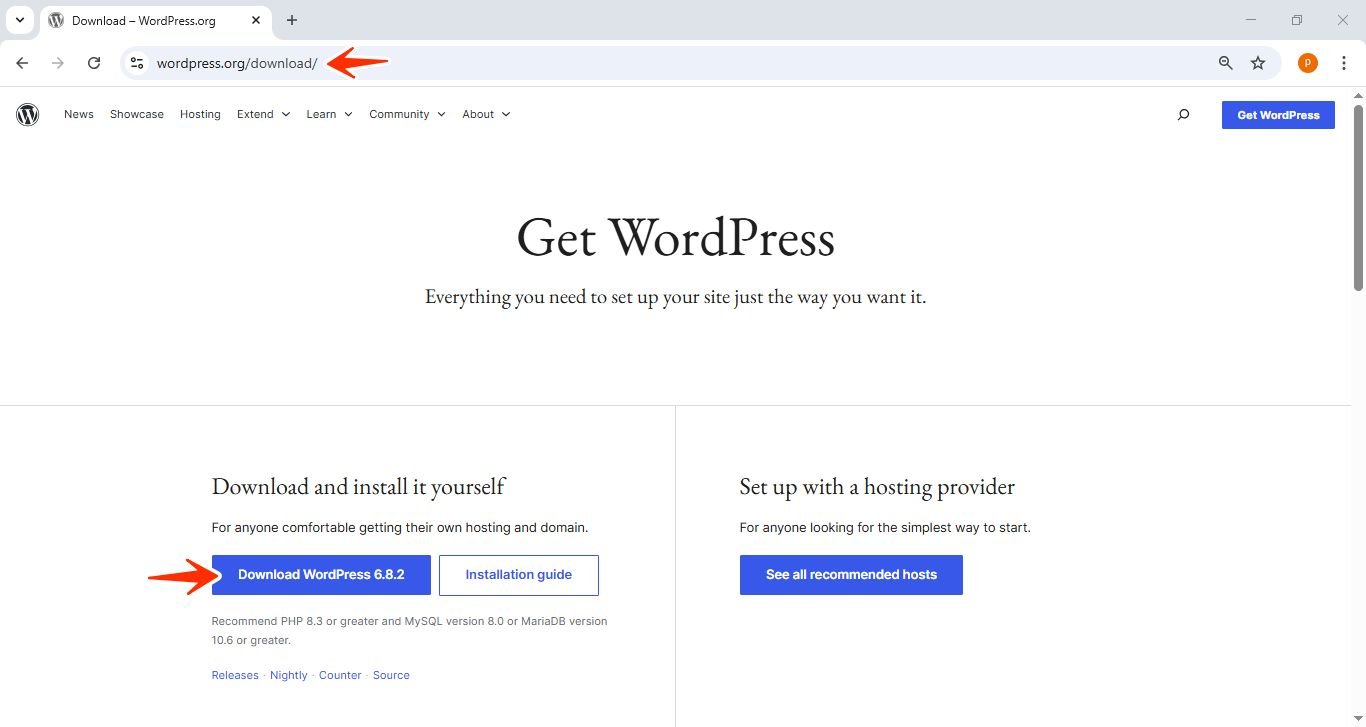
Step 4: Download WordPress
Download the latest WordPress package from the official WordPress website.
You will normally receive a compressed ZIP archive.
Extract the WordPress files after downloading them.
Step 5: Move WordPress Into XAMPP
On Windows, open:
C:\xampp\htdocs
Create a folder for your WordPress installation.
For example:
C:\xampp\htdocs\wordpress
Extract the WordPress files into that folder.
Your WordPress installation will then be accessible through a local URL such as:
http://localhost/wordpress/
Step 6: Create a WordPress Database
WordPress needs a database to store website information.
Open:
http://localhost/phpmyadmin
phpMyAdmin is a web-based interface that allows you to manage your database server.
Select the option to create a new database.
For this example, you can call it:
wordpress
The database name doesn’t have to be exactly this, but remember whatever name you choose because you’ll need it during installation.
Step 7: Start the WordPress Installer
Now open:
http://localhost/wordpress/
The WordPress installation screen should appear.
Choose your preferred language and continue.
WordPress will then ask for your database connection information.
Step 8: Enter Database Information
For a typical local XAMPP setup, the values may look similar to this:
| Setting | Example |
|---|---|
| Database Name | wordpress |
| Username | root |
| Password | Depends on your local configuration |
| Database Host | localhost |
| Table Prefix | wp_ |
Important
The exact database username and password depend on how your local database server is configured.
Don’t assume that every XAMPP installation uses the same credentials.
If you changed your database configuration, enter the credentials you actually configured.
Step 9: Complete the WordPress Installation
After WordPress successfully connects to the database, you’ll be asked for information about your website.
You will typically provide:
Site Title
The name of your website.
Example:
TechAnees
Admin Username
The username you’ll use to access the WordPress dashboard.
Avoid using an extremely predictable administrator username.
Admin Password
Create a strong, unique password.
Never reuse an important password from another account.
Admin Email
Use an email address that you can access.
This can be important for account notifications and recovery.
Step 10: Install WordPress
Review the information you’ve entered.
Then start the installation.
If everything is configured correctly, WordPress will complete the installation and provide access to the login page.
Step 11: Log In to WordPress
For a local installation, the dashboard URL will commonly be:
http://localhost/wordpress/wp-admin/
Enter the administrator username and password you created during installation.
You’ll then arrive at the WordPress dashboard.
Understanding the WordPress Dashboard
The WordPress dashboard is the control center of your website.
Depending on your installation and plugins, you may see sections such as:
Posts
Create and manage blog articles.
Media
Upload and manage images, videos, documents, and other media.
Pages
Create static pages such as:
- About
- Contact
- Privacy Policy
- Terms & Conditions
Comments
Manage visitor comments.
Appearance
Manage themes, menus, widgets, and other design-related settings.
Plugins
Install, activate, deactivate, and manage plugins.
Users
Manage website users and their roles.
Settings
Configure important WordPress settings.
Important WordPress Settings
After installation, don’t immediately install dozens of plugins.
First configure the basic settings.
Set Your Site Title
Go to your WordPress settings and make sure your website name is correct.
Your site title should represent your brand or website topic.
Set Your Tagline
A tagline briefly explains your website.
For example:
Technology Tutorials for Beginners
Don’t force keywords into the tagline.
Make it understandable to visitors.
Check Your Site Address
Make sure the WordPress Address and Site Address are configured correctly.
For a local installation, these may contain your localhost address.
For a live website, they should use your actual domain.
Set Your Permalink Structure
Permalinks determine the structure of your website URLs.
A readable URL is easier for people to understand.
For example:
example.com/wordpress-installation-guide/
is generally clearer than a URL containing an arbitrary post ID.
Choose a permalink structure that produces clean, readable URLs and keep it consistent.
Install a Theme
To change your website’s appearance:
- Open Appearance
- Open Themes
- Select Add New
- Search for a theme
- Review its features
- Install the theme
- Activate it
If you have a theme ZIP file, WordPress can also provide an upload option depending on your setup.
Before Installing a Theme
Check:
- Is it actively maintained?
- Is it compatible with your WordPress version?
- Is it responsive?
- Does it have good documentation?
- Does it come from a trustworthy source?
Avoid downloading themes from suspicious websites.
Install a Plugin
To install a plugin:
- Open Plugins
- Select Add New
- Search for the plugin
- Review the plugin information
- Install it
- Activate it
Only install plugins that you actually need.
Every additional plugin can add complexity and may introduce compatibility, performance, or security considerations.
Create Your First Page
A new website normally needs several important pages.
For example:
- Home
- About
- Contact
- Privacy Policy
- Terms & Conditions
Go to:
Pages → Add New
Create your page content and publish it.
Create Your First Blog Post
To publish an article:
Posts → Add New
Enter your article title and content.
You can add:
- Headings
- Paragraphs
- Images
- Lists
- Links
- Quotes
- Tables
- Other supported blocks
Before publishing, preview the article on both desktop and mobile-sized screens.
Create Categories
Categories help organize your blog.
For a technology website, categories might include:
- Web Development
- WordPress
- Computer Basics
- Domain & Hosting
- HTML
- CSS
- JavaScript
Don’t create dozens of categories with only one article in each.
Start with a small, logical structure and expand it as your content grows.
Create a Navigation Menu
A navigation menu helps visitors move around your website.
Your primary menu might contain:
Home | Web Development | WordPress | Tech | About | Contact
The exact structure should depend on your site’s content.
Keep the menu simple.
Visitors shouldn’t need to search through ten different menus to find an article.
WordPress Security Basics
Security should be considered from the beginning.
Use Strong Passwords
Use unique passwords for your WordPress administrator account.
Keep WordPress Updated
Keep WordPress core, themes, and plugins updated when appropriate.
Remove Unused Plugins
If you don’t need a plugin, consider removing it rather than leaving unnecessary software installed.
Use Trusted Sources
Install themes and plugins from reputable sources.
Create Backups
Maintain backups so you have a recovery option if something goes wrong.
How to Move From Local WordPress to a Live Website
A local WordPress website runs on your computer.
Visitors on the public internet cannot normally access it.
To publish your website online, you’ll need a suitable hosting environment.
A typical process is:
Local WordPress
↓
Choose hosting
↓
Register/connect domain
↓
Set up hosting
↓
Install WordPress
↓
Configure website
↓
Enable HTTPS
↓
Publish your website
If you already have a WordPress website on your computer and want to move that exact installation online, the migration process involves transferring the website files and database and updating the relevant URLs/configuration.
For beginners, installing a fresh WordPress instance on hosting can sometimes be simpler than manually migrating a test installation.
Local WordPress vs Live WordPress
| Local WordPress | Live WordPress |
|---|---|
| Runs on your computer | Runs on a web server |
| Mainly for development/testing | Accessible to visitors |
| Usually uses localhost | Uses a domain |
| Doesn’t require public hosting | Requires hosting |
| Good for learning | Good for publishing |
| Private by default | Public when configured |
Both environments are useful.
A common workflow is to experiment locally and publish the finished website on a live hosting environment.
Common WordPress Beginner Mistakes
Installing Too Many Plugins
More plugins don’t automatically mean a better website.
Install only what you need.
Choosing a Theme Only Because It Looks Good
A beautiful theme can still have poor performance, weak accessibility, or limited maintenance.
Look at the overall quality, support, compatibility, and performance.
Ignoring Updates
Outdated software can create security and compatibility problems.
Using Weak Admin Credentials
Never use an easily guessable password.
Publishing Without Testing
Check your website before making it public.
Test:
- Navigation
- Forms
- Links
- Images
- Mobile layout
- Page loading
- HTTPS
- Contact functionality
Frequently Asked Questions
Is WordPress free?
The WordPress software is open source and can be used without purchasing the software itself. However, running a self-hosted website can involve costs such as domain registration, hosting, premium themes, or premium plugins.
Do I need coding knowledge to use WordPress?
No. Many WordPress tasks can be completed without programming knowledge. However, learning HTML, CSS, JavaScript, PHP, and basic web concepts can be very useful when you want deeper customization.
Can I install WordPress on my computer?
Yes. You can create a local development environment using software such as XAMPP and run WordPress locally.
Can I create an online store with WordPress?
Yes. WordPress can be extended with e-commerce software and plugins to create an online store.
What is the difference between a WordPress theme and plugin?
A theme primarily controls the presentation and design of your website, while a plugin adds or modifies functionality.
Can WordPress be used for a blog?
Yes. Blogging is one of the major uses of WordPress.
Do I need hosting for a local WordPress website?
No. A local installation runs on your computer using a local server environment.
For a publicly accessible website, you generally need web hosting or another suitable hosting environment.
What is wp-admin?
wp-admin is the WordPress administration area used to manage your website.
For example, a local installation might use:
http://localhost/wordpress/wp-admin/
A live installation might use:
https://yourdomain.com/wp-admin
WordPress Setup Checklist
Before considering your WordPress website ready, check:
- WordPress installed successfully
- Administrator account secured
- Site title configured
- Tagline reviewed
- Permalinks configured
- Theme selected
- Unnecessary themes removed
- Required plugins installed
- Unnecessary plugins removed
- About page created
- Contact page created
- Privacy Policy page created
- Navigation menu configured
- Categories organized
- First article published
- Website tested on mobile
- Backups configured
- WordPress and extensions kept updated

About Techanees
Techanees is a technology platform sharing simple tutorials, useful guides, web development tips, and the latest tech updates for beginners and enthusiasts.
really good article and helpful
I not gonna lie, it caught my eye. I am trying my luck. See you