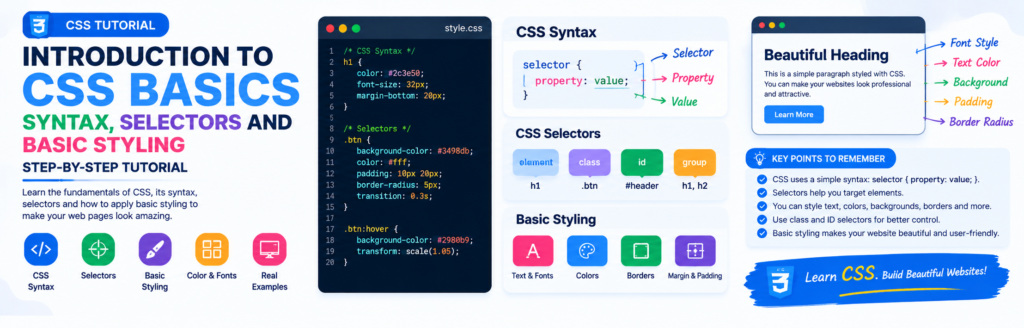
CSS for Beginners Complete Introduction to CSS, Syntax, Selectors and Basic Styling
Learn CSS from the beginning with simple explanations and practical examples. Understand CSS syntax, selectors, colors, fonts, backgrounds, borders, spacing, and how to style your first webpage.
If you have learned basic HTML, you already know how to create the structure of a webpage. You can add headings, paragraphs, images, links, buttons, lists, tables, and other elements.
But HTML alone does not give your website a modern design.
A webpage made with only HTML may look plain because the browser applies its own default styles. CSS, or Cascading Style Sheets, allows you to control the appearance and layout of HTML elements, including colors, fonts, spacing, borders, backgrounds, and much more.
Think of it this way:
HTML = Structure
CSS  = Design
JavaScript = Behavior
For example, HTML can create a button:
<button>Start Learning</button>
CSS can make that button attractive:
button {
    background-color: black;
    color: white;
    padding: 12px 20px;
    border-radius: 6px;
}
What You Will Learn
After completing this tutorial, you will understand:
- What CSS is
- Why CSS is important
- How CSS works with HTML
- CSS syntax
- CSS selectors
- Element selectors
- Class selectors
- ID selectors
- Universal selector
- Grouping selectors
- Attribute selectors
- How to add CSS to HTML
- Inline CSS
- Internal CSS
- External CSS
- CSS comments
- Colors
- Backgrounds
- Fonts
- Text styling
- Width and height
- Borders
- Border radius
- Basic spacing
- A complete beginner CSS project
- Common CSS mistakes
What Is CSS?
CSS stands for:
Cascading Style Sheets
CSS is a stylesheet language used to control how HTML content looks and how it is presented on a webpage. It can control things such as colors, fonts, spacing, backgrounds, borders, and layout.
For example, consider this HTML:
<h1>Welcome to TechAnees</h1>
<p>Learn web development step by step.</p>
Without your own CSS, the browser applies its default styles.
With CSS, you can change the appearance:
h1 {
    color: blue;
}

p {
    color: gray;
    font-size: 18px;
}
Now the heading and paragraph have your own styling.
Live Code Example:
<h1>Welcome to TechAnees</h1>
<p>Learn web development step by step.</p>
h1 {
    color: blue;
}

p {
    color: gray;
    font-size: 18px;
}
Welcome to TechAnees
Learn web development step by step.
Why Do We Need CSS?
Imagine visiting a website where every heading, paragraph, button, image, and section has only the browser’s default appearance.
The website would be difficult to design professionally.
CSS allows you to create:
- Attractive colors
- Better typography
- Spacing
- Cards
- Buttons
- Navigation bars
- Responsive layouts
- Backgrounds
- Borders
- Flexible layouts
- Animations
- Professional interfaces
CSS is therefore one of the fundamental technologies of modern web development.
HTML vs CSS
HTML and CSS have different responsibilities.
| Technology | Main purpose |
|---|---|
| HTML | Creates webpage structure |
| CSS | Controls appearance and layout |
| JavaScript | Adds behavior and interaction |
For example:
<h1>Learn CSS</h1>
HTML creates the heading.
Then:
h1 {
    color: blue;
    font-size: 40px;
}
CSS changes its appearance.
Later, JavaScript can make the page interactive.
How CSS Works
CSS works by selecting HTML elements and applying style rules to them.
For example:
p {
    color: green;
}
The browser finds the <p> elements that match the selector and applies the declaration.
The basic idea is:
CSS Selector
     ↓
Find HTML element
     ↓
Apply CSS declarations
     ↓
Browser displays styled element
Basic CSS Syntax
A CSS rule normally looks like this:
selector {
    property: value;
}
For example:
h1 {
    color: blue;
    font-size: 32px;
}
Let’s understand every part.
Selector
h1
The selector tells CSS which HTML element you want to style.
Declaration Block
{
    color: blue;
    font-size: 32px;
}
The curly braces contain the declarations.
Property
color
The property describes what you want to change.
Value
blue
The value tells the browser what setting to use.
So:
color: blue;
means:
Property = color
Value = blue
A CSS declaration ends with a semicolon:
color: blue;
A CSS rule can contain multiple declarations:
h1 {
    color: blue;
    font-size: 32px;
    text-align: center;
}
This basic structure is the foundation of CSS.
How to Add CSS to HTML
There are three traditional ways to add CSS to an HTML document:
- Inline CSS
- Internal CSS
- External CSS
For real websites, external CSS is generally the best approach because it keeps your HTML and styling separate and makes styles easier to maintain.
1. Inline CSS
Inline CSS is written directly inside an HTML element using the style attribute.
Example:
<h1 style="color: blue;">
    Welcome to CSS
</h1>
You can add multiple properties:
<p style="color: gray; font-size: 18px;">
    This is a paragraph.
</p>
Advantages
Inline CSS can be useful for:
- Quick experiments
- Small demonstrations
- One-off styles
Disadvantages
Using lots of inline CSS can make your HTML difficult to maintain.
For example, imagine writing styles individually on hundreds of elements. Updating the design later would become unnecessarily difficult.
2. Internal CSS
Internal CSS is written inside a <style> element, usually within the HTML <head>.
Example:
<!DOCTYPE html>
<html>
<head>

    <style>
        h1 {
            color: blue;
        }

        p {
            font-size: 18px;
        }
    </style>

</head>

<body>

    <h1>Learn CSS</h1>

    <p>This is my first CSS webpage.</p>

</body>
</html>
Internal CSS is useful when styles are specific to a single HTML document.
3. External CSS
External CSS places your styles in a separate .css file.
For example, create:
index.html
style.css
Inside style.css:
h1 {
    color: blue;
}

p {
    font-size: 18px;
}
Then connect it to your HTML:
<head>
    <link rel="stylesheet" href="style.css">
</head>
This approach keeps the HTML structure separate from the CSS presentation and is generally the preferred method for larger websites.
Creating Your First CSS Project
Let’s create a simple project.
HTML
<!DOCTYPE html>
<html lang="en">

<head>
    <meta charset="UTF-8">
    <meta name="viewport" content="width=device-width, initial-scale=1.0">

    <title>My First CSS Website</title>

    <link rel="stylesheet" href="style.css">
</head>

<body>

    <h1>Welcome to My Website</h1>

    <p>
        I am learning CSS and web development.
    </p>

    <button>Learn More</button>

</body>

</html>
CSS
body {
    font-family: Arial, sans-serif;
}

h1 {
    color: blue;
}

p {
    color: gray;
    font-size: 18px;
}

button {
    background-color: black;
    color: white;
    padding: 12px 20px;
    border: none;
}
Open the HTML file in your browser and you will see the difference CSS makes.
CSS Selectors
A CSS selector tells the browser which HTML elements a CSS rule should target.
CSS has many selector types. Beginners should first understand the basic selectors, then gradually learn more advanced selectors.
The most important beginner selectors are:
- Element selector
- Class selector
- ID selector
- Universal selector
- Grouping selector
- Attribute selector
1. Element Selector
An element selector targets HTML elements by their tag name.
For example:
p {
    color: green;
}
This targets paragraphs:
<p>First paragraph</p>
<p>Second paragraph</p>
<p>Third paragraph</p>
All matching <p> elements receive the style.
You can also target headings:
h1 {
    color: blue;
}

h2 {
    color: purple;
}
2. Class Selector
A class selector targets elements that have a particular class.
HTML:
<p class="highlight">
    Important information
</p>
CSS:
.highlight {
    background-color: yellow;
}
Notice the dot:
.highlight
The dot tells CSS that highlight is a class selector.
A class can be reused:
<p class="highlight">Text One</p>
<p class="highlight">Text Two</p>
<div class="highlight">Text Three</div>
All three elements can receive the same class styling.
This makes classes extremely useful for reusable components.
3. ID Selector
An ID selector targets an element with a particular id.
HTML:
<h1 id="main-title">
    My Website
</h1>
CSS:
#main-title {
    color: blue;
}
The # symbol indicates an ID selector.
Unlike the class selector:
.highlight
the ID selector is:
#main-title
Use IDs when an element needs a unique identifier. For reusable styling, classes are usually more flexible.
4. Universal Selector
The universal selector is:
*
It matches all elements.
For example:
* {
    box-sizing: border-box;
}
A common basic reset might include:
* {
    margin: 0;
    padding: 0;
    box-sizing: border-box;
}
Be careful with universal rules because they affect many elements at once.
5. Grouping Selectors
Suppose you want the same style for:
h1
h2
p
Instead of writing three separate rules:
h1 {
    color: black;
}

h2 {
    color: black;
}

p {
    color: black;
}
you can group them:
h1,
h2,
p {
    color: black;
}
The comma allows multiple selectors to share the same declarations.
6. Attribute Selectors
CSS can also select elements based on attributes.
For example:
<input type="text">
<input type="email">
<input type="password">
You can target email inputs:
input[type="email"] {
    border: 2px solid blue;
}
This is called an attribute selector.
Attribute selectors become particularly useful when styling forms and more complex interfaces.
Understanding Selector Specificity
Sometimes two CSS rules target the same element.
For example:
p {
    color: blue;
}

.highlight {
    color: red;
}
and:
<p class="highlight">
    Hello CSS
</p>
Both rules match the paragraph.
The browser uses the CSS cascade and selector specificity to determine which declaration wins. Specificity gives different selector types different weights; IDs generally have greater specificity than classes, which generally have greater specificity than type selectors.
As a beginner, remember this simple idea:
Element selector < Class selector < ID selector
But don’t solve every CSS conflict by adding more IDs or !important. Learning the cascade and keeping selectors reasonably simple will make your CSS much easier to maintain.
CSS Comments
Comments allow you to write notes inside your CSS.
Syntax:
/* This is a CSS comment */
Example:
/* Main heading */
h1 {
    color: blue;
}
Comments are ignored by the browser.
You can use them to explain sections of your stylesheet:
/* =========================
   Header Styles
========================= */

.header {
    padding: 20px;
}
CSS Colors
One of the first things beginners usually want to learn is how to change colors.
You can write colors using names:
h1 {
    color: red;
}
You can also use hexadecimal values:
h1 {
    color: #ff0000;
}
RGB:
h1 {
    color: rgb(255, 0, 0);
}
And HSL:
h1 {
    color: hsl(0, 100%, 50%);
}
For example:
.title {
    color: #2563eb;
}
The exact color format you choose depends on the situation and your design system.
Changing Text Color
Use:
color
Example:
p {
    color: #444;
}
You can style different elements separately:
h1 {
    color: #222;
}

p {
    color: #555;
}

a {
    color: blue;
}
CSS Background Colors
Use:
background-color
Example:
body {
    background-color: #f5f5f5;
}
Or:
.card {
    background-color: white;
}
You can combine text and background colors:
.card {
    background-color: #222;
    color: white;
}
CSS Background Images
You can also use an image as a background:
.hero {
    background-image: url("hero.jpg");
}
For a practical hero section:
.hero {
    background-image: url("hero.jpg");
    background-size: cover;
    background-position: center;
}
These properties are commonly used together to make a background image fill a section nicely.
CSS Fonts
Typography is an important part of web design.
The most common properties you should learn first are:
font-family
font-size
font-weight
font-style
line-height
font-family
body {
    font-family: Arial, sans-serif;
}
You can provide fallback fonts:
body {
    font-family: Arial, Helvetica, sans-serif;
}
If the first font isn’t available, the browser can use the next available option.
font-size
Use font-size to control text size.
p {
    font-size: 18px;
}
You can also use relative units such as:
font-size: 1rem;
or responsive sizing techniques such as:
font-size: clamp(1.5rem, 4vw, 3rem);
For now, beginners can start with px and rem and learn other units as they progress.
font-weight
Controls the thickness of text.
h1 {
    font-weight: 700;
}
You can also use:
font-weight: normal;
or:
font-weight: bold;
font-style
For italic text:
p {
    font-style: italic;
}
line-height
line-height controls the vertical space between lines of text.
Example:
p {
    line-height: 1.6;
}
This can make long paragraphs easier to read.
Text Alignment
Use:
text-align
Examples:
h1 {
    text-align: center;
}
Other common values include:
text-align: left;
text-align: right;
text-align: center;
You may also encounter:
text-align: justify;
Use text alignment according to the design and readability of your page.
Text Decoration
You can control text decoration with:
text-decoration
For example:
a {
    text-decoration: none;
}
This removes the default underline from the link.
You can also use:
text-decoration: underline;
CSS Width and Height
You can control an element’s dimensions using:
width
height
Example:
.card {
    width: 300px;
    height: 200px;
}
You can also use percentage values:
.container {
    width: 80%;
}
And flexible sizing such as:
.container {
    width: min(1100px, 90%);
}
As you progress through CSS, you will learn why flexible and responsive sizing is often preferable to fixed dimensions.
CSS Borders
The border property creates a border around an element.
Example:
.box {
    border: 2px solid black;
}
A border usually consists of:
Border width
Border style
Border color
For example:
.box {
    border-width: 2px;
    border-style: solid;
    border-color: black;
}
The shorthand is:
.box {
    border: 2px solid black;
}
Different Border Styles
You can use different styles:
border: 2px solid black;
border: 2px dashed black;
border: 2px dotted black;
You can also style individual sides:
.box {
    border-top: 2px solid black;
    border-right: 2px solid blue;
    border-bottom: 2px solid red;
    border-left: 2px solid green;
}
Rounded Corners
Use:
border-radius
Example:
.card {
    border-radius: 12px;
}
This creates rounded corners.
You can create a circular shape from a square element:
.profile {
    width: 100px;
    height: 100px;
    border-radius: 50%;
}
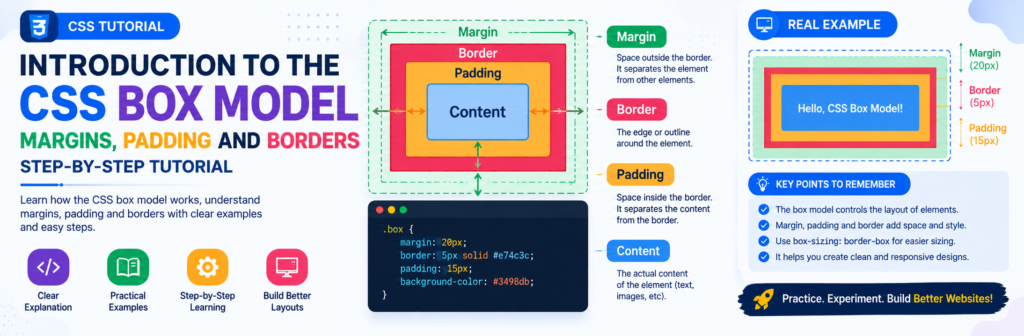
CSS Spacing: Margin and Padding
Spacing is one of the most important parts of CSS.
There are two properties beginners must understand:
margin
padding
Padding
Padding creates space inside the element, between the content and border.
.card {
    padding: 20px;
}
Margin
Margin creates space outside the element, separating it from surrounding elements.
.card {
    margin: 20px;
}
Think of it this way:
Content
   ↓
Padding
   ↓
Border
   ↓
Margin
The complete CSS Box Model will be covered in detail in the next lesson.
Styling a Simple Card
Now let’s combine what we have learned.
HTML
<div class="card">

    <h2>Learn CSS</h2>

    <p>
        CSS helps you create attractive and responsive
        webpages.
    </p>

    <a href="#">Start Learning</a>

</div>
CSS
.card {
    width: 320px;
    padding: 25px;
    background-color: white;
    border: 1px solid #ddd;
    border-radius: 12px;
}

.card h2 {
    color: #222;
    font-size: 26px;
}

.card p {
    color: #555;
    line-height: 1.6;
}

.card a {
    color: blue;
    text-decoration: none;
}
This is already starting to look like a real website component.
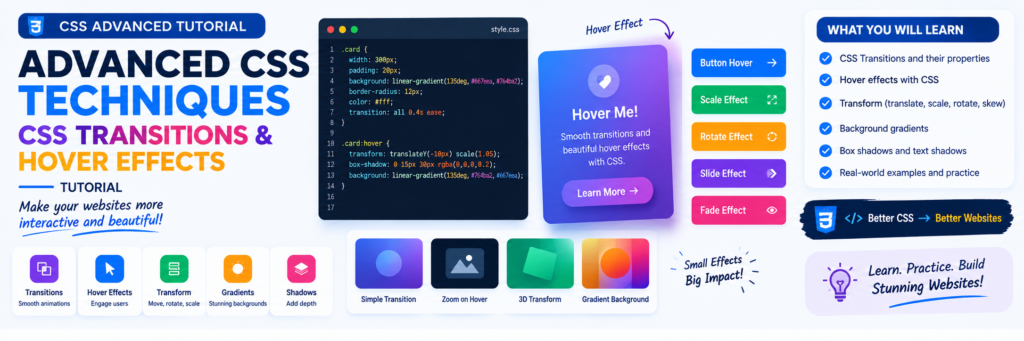
Adding a Hover Effect
CSS can also change an element when the user moves the mouse over it.
The :hover pseudo-class is commonly used for this.
.card:hover {
    transform: translateY(-5px);
}
You can also change a button:
button {
    background-color: black;
    color: white;
}

button:hover {
    background-color: #333;
}
Later in the CSS course, you can learn transition to make these changes smoother.
A Complete Beginner CSS Project
Let’s build a small webpage using the concepts from this lesson.
HTML
<!DOCTYPE html>
<html lang="en">

<head>

    <meta charset="UTF-8">

    <meta
        name="viewport"
        content="width=device-width, initial-scale=1.0"
    >

    <title>CSS Beginner Project</title>

    <link rel="stylesheet" href="style.css">

</head>

<body>

    <header class="header">

        <h1>Learn CSS</h1>

        <p>
            Start your journey into web design.
        </p>

    </header>

    <main class="container">

        <section class="card">

            <h2>CSS Basics</h2>

            <p>
                Learn CSS syntax, selectors, colors,
                fonts, backgrounds, borders and spacing.
            </p>

            <a href="#">Read Lesson</a>

        </section>

        <section class="card">

            <h2>CSS Layout</h2>

            <p>
                Learn how to create layouts using
                Flexbox, Grid and responsive design.
            </p>

            <a href="#">Read Lesson</a>

        </section>

    </main>

</body>

</html>
CSS
* {
    box-sizing: border-box;
}

body {
    margin: 0;
    font-family: Arial, sans-serif;
    background-color: #f5f5f5;
    color: #222;
}

.header {
    text-align: center;
    padding: 50px 20px;
    background-color: #222;
    color: white;
}

.header h1 {
    margin: 0 0 10px;
    font-size: 40px;
}

.header p {
    margin: 0;
    line-height: 1.6;
}

.container {
    width: min(1000px, 90%);
    margin: 40px auto;
}

.card {
    margin-bottom: 20px;
    padding: 25px;
    background-color: white;
    border: 1px solid #ddd;
    border-radius: 12px;
}

.card h2 {
    margin-top: 0;
}

.card p {
    color: #555;
    line-height: 1.6;
}

.card a {
    color: blue;
    text-decoration: none;
    font-weight: bold;
}

.card a:hover {
    text-decoration: underline;
}
This small project gives you practical experience with:
HTML structure
CSS selectors
Colors
Typography
Backgrounds
Borders
Border radius
Margin
Padding
Width
Hover
External CSS
How to Organize Your CSS File
As your website grows, your stylesheet can become large.
Instead of putting everything randomly into one file, organize it logically.
For example:
/* =========================
   General Styles
========================= */

/* =========================
   Header
========================= */

/* =========================
   Navigation
========================= */

/* =========================
   Main Content
========================= */

/* =========================
   Cards
========================= */

/* =========================
   Buttons
========================= */

/* =========================
   Footer
========================= */

/* =========================
   Responsive Styles
========================= */
Good organization makes CSS easier to understand and maintain.
Common CSS Mistakes Beginners Make
1. Forgetting the Semicolon
Incorrect:
p {
    color: red
    font-size: 18px;
}
Better:
p {
    color: red;
    font-size: 18px;
}
2. Forgetting the Dot for a Class
Incorrect:
highlight {
    color: red;
}
Correct:
.highlight {
    color: red;
}
3. Forgetting the Hash for an ID
Incorrect:
main-title {
    color: blue;
}
Correct:
#main-title {
    color: blue;
}
4. Forgetting the CSS File Link
If your stylesheet is called:
style.css
make sure your HTML contains:
<link rel="stylesheet" href="style.css">
Otherwise, the browser will not load that external stylesheet.
5. Using the Wrong Property Name
CSS property names must be written correctly.
For example:
font-size: 20px;
not:
text-size: 20px;
6. Forgetting Units
Many CSS properties require an appropriate unit.
For example:
font-size: 20px;
instead of:
font-size: 20;
Some properties do accept unitless values, such as:
line-height: 1.6;
so learn the expected value type for each property.
Frequently Asked Questions
What does CSS stand for?
CSS stands for Cascading Style Sheets.
What is CSS used for?
CSS is used to control the appearance and presentation of webpages, including colors, typography, spacing, backgrounds, borders, and layouts.
Is CSS a programming language?
CSS is a stylesheet language rather than a general-purpose programming language. It describes how HTML content should be presented.
What is a CSS selector?
A selector identifies the HTML elements to which a CSS rule should apply.
What is the difference between a class and an ID?
A class is designed for reusable grouping and styling:
.card
An ID identifies a particular element:
#header
For reusable CSS components, classes are usually the better choice.
What is external CSS?
External CSS is CSS stored in a separate .css file and connected to an HTML document using a <link> element.
Which CSS method should I use for a website?
For most multi-page websites, external stylesheets are a practical choice because they separate structure from presentation and make styles easier to maintain.
Why isn’t my CSS working?
Check:
- The selector is correct.
- The CSS syntax is correct.
- Your stylesheet is linked correctly.
- The filename is correct.
- The CSS file is in the expected location.
- Another CSS rule isn’t overriding your declaration.
- Your browser isn’t showing an outdated cached version.
Browser Developer Tools are extremely useful for finding these problems.
Related CSS Tutorials
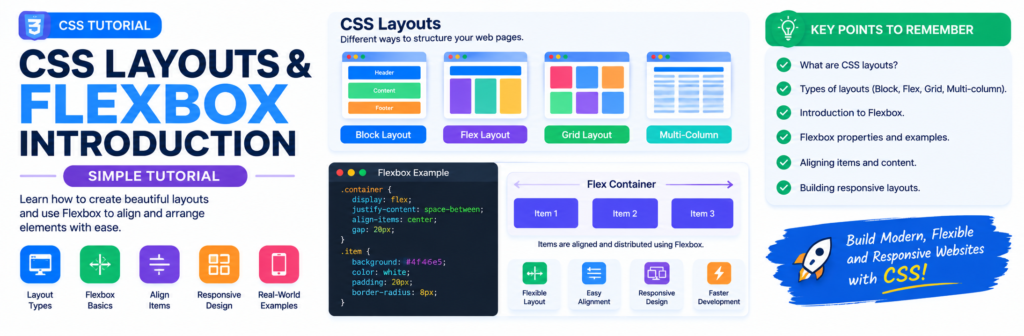
CSS Box Model Margin, Padding & Borders
CSS Transitions & Hover Effects

About Techanees
Techanees is a technology platform sharing simple tutorials, useful guides, web development tips, and the latest tech updates for beginners and enthusiasts.
Very helpful tutorial
Wow, wonderful blog layout! How lengthy have you ever been blogging for?
you maje running a blog look easy. The full look of your site is excellent, let alone thee content!